What a Professional Oven Deep Clean Actually Involves
Racks out, doors off, panels separated - a Selwyn oven specialist walks through the real process behind those before-and-after photos.
- oven cleaning
- deep clean
- professional oven cleaning
What a Professional Oven Deep Clean Actually Involves
People see my before-and-after photos and ask two questions. The first is “is that really the same oven?” — yes, and I’ve had the pleasure of watching faces say it louder than mouths could. The second is “so what do you actually do to it?”
It’s a fair question. A proper deep clean isn’t a stronger spray or more elbow grease; it’s a sequence. Every step exists because skipping it shows in the result. Here’s the honest walkthrough of how I bring an oven back — no secrets, just craft.
Step one: look before you lift
Every clean starts with a proper inspection. How do the racks come out? Does this door lift off, or do the panels separate? Where is the grease thickest, and what’s actually burnt-on carbon versus fresh spillage? Ovens differ enormously between brands and years, and knowing how yours comes apart — without forcing anything — is the difference between a specialist and someone having a bad afternoon with your appliance.
This is also where I spot the things worth mentioning: a door seal on its way out, an element looking unhappy. Not repairs I offer — just honest observations from someone who sees a lot of ovens.
Step two: strip and soak
The racks, shelves, trays and any removable parts come right out. This surprises people who’ve only ever cleaned around their racks — which is most of us, because removing them always seems like it’ll be more trouble than it’s worth.
Those components go into a heated soak using eco-friendly degreasing solution. Soak time does what scraping never will: baked-on grease softens layer by layer until it wipes away instead of fighting back. It’s the least glamorous part of the job and the reason the results look effortless afterwards. Across the industry this heated-soak approach is standard practice among professional cleaners precisely because nothing else touches heavy carbon as well.
Step three: the cavity, section by section
With the internals out, the empty cavity gets hand-treated: sides, back, roof, floor, around the fan cover and along the edges where the seal meets metal. Grease hides in corners and seams that a quick wipe never reaches, and each surface gets treated, agitated and rinsed rather than sprayed-and-hoped.
This is slow, deliberate work. It’s also where the smell lives — old carbonised grease is what makes an oven smoke and pong every time you roast — so it’s the step that changes how your kitchen feels, not just looks.
Step four: the door, done properly
If I had to name the single thing that separates a professional finish from a domestic one, it’s the door. That grey-brown haze you see through the glass? Usually it’s not on either face of the glass you can reach — it’s between the panes, or baked onto surfaces only exposed once the door comes apart.
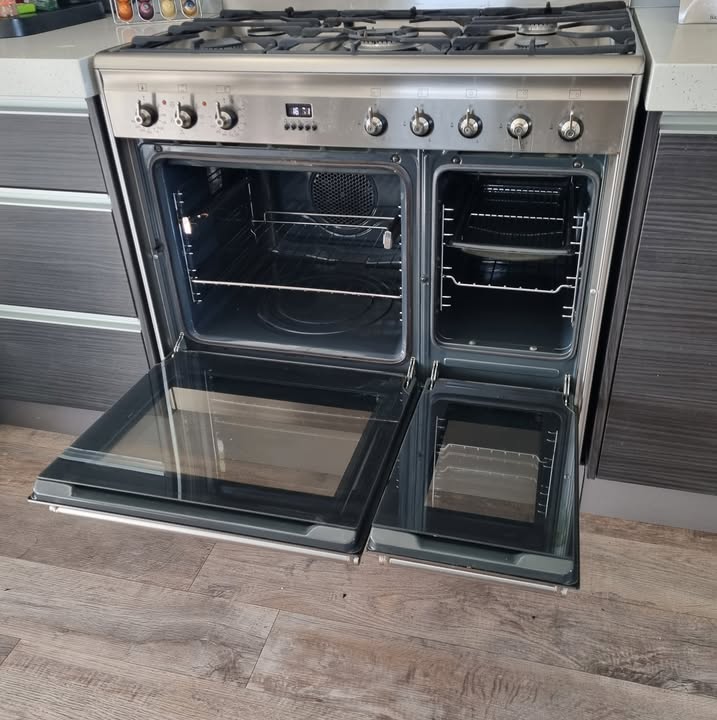
On many ovens the inner panels can be removed or the whole door lifts away cleanly. Where your model allows, that’s exactly what happens: glass cleaned front and back, panels washed, seals wiped, everything reassembled so it sits true. My own photos include a door-off double oven mid-clean for precisely this reason — it’s the part of the job customers rarely see and always notice.
Step five: rinse, reassemble, test
Everything comes back together: racks dried and returned to runners, trays seated, door hung and closed properly. Then the oven gets switched on and checked — because the last thing anyone wants is discovering a mis-seated rack or a door that doesn’t sit square at next Sunday’s roast. Your kitchen gets left tidy, floors clear of my gear, mess gone with me.
And because I work with eco-friendly products throughout, there are no harsh chemical smells when I leave. The oven is ready to cook in straight away — usually the same evening, if you’re organised enough to know what’s for dinner. I rarely am.
Why the DIY version doesn’t compare
None of these steps requires magic — they require kit, soak capacity and repetition. That’s genuinely all a professional clean is: the right setup plus the better part of a decade of doing this weekly. If you enjoy the DIY version, keep at it — maintenance between visits matters. But be realistic about what supermarket spray achieves against layered carbon; I’ve written separately about the common DIY oven cleaning myths if you want the honest scorecard.
Curious what your oven would look like?
Ring or text 021 054 4661, email kimredmond60@gmail.com, or message me via Facebook for a free quote. I cover Darfield, Selwyn and Christchurch, and full service details live on my oven cleaning page. And if you’re wondering whether yours is too far gone — read about the ovens everyone had given up on first.